Showing posts with label CODE::BLOCKS. Show all posts

Wednesday, August 6, 2008

Integral table computation

The raw data:

a

b

c

d

e

f

g

h

i

j

k

l

m

n

o

p

q

r

s

t

u

v

w

x

y


The integral data:

E

F

A

B

G

C

D

H

I

 
     The integral rule is that each element in the integral table is sum of upper-left elements( including itself ). e.g,
  • A = a + b + f + g
  • B = a + b + c + f + g + h
  • C = a + b + f + g + k + l
  • D = a + b + c + f + g + h + k + l + m

We can, therefore, simply archive the integral table by 4 "for loop"

for(int j = 0; j < height; j++) 
{
for(int i = 0; i < width; i++)
{
integral[j][i] = 0;
for(int y = 0; y <= j; y++)
{
for(int x = 0; x <= i; x++)
{
integral[j][i] += rawdata[y][x];
}
}
}
}


but it is too inefficiency and consuming too many operations when computing in such simple way . Thus, we can examine the integral table, it can be found that D could be get from the 3 nearest upper-left element A, B, C. So D = m + B + C - A. In addition we must consider the boundary problem, when processing the first row it's just the sum of the current raw data and the left integral data, e.g, F = d + E. The same as above, when processing the first colume it's just the sum of the current raw data and the upper integral data, e.g, H = p + G. Therefore, the computation can be archieved by using only 2 "for loop"


for(int j = 0; j < height; j++) 
{
for(int i = 0; i < width; i++)
{
if((j == 0) && (i == 0))// process the first col and row element
integral[j][i] = rawdata[j][i];
else if((j == 0) && (i != 0))// process the first row element
integral[j][i] = rawdata[j][i] + integral[j][i-1];
// F = d + E
else if((j != 0) && (i == 0))// process the first col elements
integral[j][i] = rawdata[j][i] + integral[j-1][i];
// H = p + G
else // process the normal element
integral[j][i] = rawdata[j][i] + integral[j-1][i] +
integral[j][i-1] - integral[j-1][i-1];
// D = m + B + C - A
}
}


[ Download ]: test file (C::B project)

Read More...

Sunday, May 18, 2008

Building Boost C++ lib for MINGW and coding in Code::Blocks

boost + splash_new blank

Boost C++ Libraries is one of the most highly regarded and expertly designed C++ library projects in the world. It provides many efficient algorithms to help App developers to improve their program. However, the Boost's official website offers only source files and Build Tools ( Boost JAM ), we must build the suitable Lib according to the compiler ( like GNU GCC Compiler, Borland C++ Compiler or VC++ Compiler ). Althought, there're many pre-builded destro providered by some unofficial website, most of them are for VC++ Compiler.

Here's a tutorial for building Boost C++ Lib for MINGW GCC Compiler.

  • First of all, Download Boost from the Boost website. You will need the actual Boost package (source) and the Boost Jam package (binary NTx86). Unpack the first package to any location on you harddisk and unpack the file "bjam.exe'' from the second package to a directory contained in your search path (e.g. "C:\MinGW\bin'' or "C:\Program Files\CodeBlocks\MinGW\bin").
  • Then open a shell (cmd.exe) and change into the directory you have unpacked the Boost package to. Type the following command:
    C:\....\boost_1_35_0\>bjam --toolset=gcc --prefix=C:\Boost install
  • While building, it'll take 30 mins up to couple hours depends on your machine. So be patiant.
  • Then Boost C++ Lib will be installed in "C:\Boost\include\boost-version"

After that. we can use Boost to code for MINGW GCC Compiler in Code::Blocks IDE. Before coding, add the Boost "include" and "lib" into the compiler search dictionary.

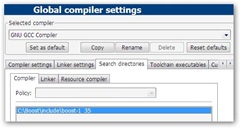
  • Open the Code::Blocks IDE, then click on "settings""compiler and debugger...", change to "search dictionary" page and add "C:\Boost\include\boost-1_35" into "compiler" page.sshot-1
  • Then add "C:\Boost\lib" into  "Linker" page.

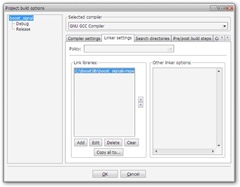
Creat a new Console Application project for C++,  click "Project" → "Build options...". Add the lib you need in your project (e.g. C:\Boost\lib\boost_signals-mgw34-mt-1_35.lib)

sshot-1

Then code following code in main.cpp

// Boost.Signals library

// Copyright Douglas Gregor 2001-2003. Use, modification and
// distribution is subject to the Boost Software License, Version
// 1.0. (See accompanying file LICENSE_1_0.txt or copy at
// http://www.boost.org/LICENSE_1_0.txt)

// For more information, see http://www.boost.org

#include
#include
#include
#include

struct HelloWorld
{
void operator()() const
{
std::cout << "Hello, World!" << std::endl;
}
};

int
test_main(int, char* [])
{
// Signal with no arguments and a void return value
boost::signal sig;

// Connect a HelloWorld slot
HelloWorld hello;
sig.connect(hello);

// Call all of the slots
//sig();
return 0;
}


Compilation will be completed.

If you have any question, it's great to post in comment :-)


Read More...

Wednesday, November 7, 2007

Configuration of Qt4 in Code::Blocks


Qt sets the standard for high-performance, cross-platform application development. It includes a C++ class library and tools for cross-platform development and internationalization. Qt is also available to Java programmers through Qt Jambi.

This article is NOT a tutorial for programing Qt4 application. It's only made as a note for setting Qt4 in Code::Blocks. Just following the steps below you can easily configure the setting. After all, you could enjoy coding your GUI programs and have fun.


  1. You must have installed Code::Blocks on your OS and make sure that Code::Blocks has been upgrade by the latest Nightly Build.
  2. Then Go to Qt4 download page and get the Qt/Windows Open Source Edition.
  3. After completing Qt4 installation, let's start Code::Blocks then open "Global Variable Editor" and press "New" to create a variable named "qt4" and set "base","include", "lib" path according to the Qt4 installation path. The figure below shows the Qt4 default installation path.

  4. Now you can develop your own Qt4 application. Click on File>>New>>Project.. and select "QT4 project" to start the QT4 project wizard as shown below.


  5. When finishing the Qt4 wizard, there are some simple codes in the project main cpp file. You could build and run directly without doing anything. It is a program only contains a Quit button as figure showed below.


Read More...

Tuesday, May 15, 2007

Day record - 2007 May 15


convert wxImage to IplImage by "WxImageToIplImage(const wxImage* wx_Image)"
Image processing(as the picture show above)
convert IplImage to wxImage by "IplImageToWxImage(const IplImage* cv_Image)"
Load the wxImage(processed) into my test application and show it.


/*********************************
Convert wxImage to IplImage format.
*********************************/
IplImage* GUIFrame::WxImageToIplImage(const wxImage* wx_Image)
{
if (wx_Image == NULL) return NULL ;
int nWidth = wx_Image->GetWidth () ;
int nHeight = wx_Image->GetHeight () ;
IplImage* cv_Image = NULL ;
cv_Image = cvCreateImage(cvSize(nWidth, nHeight), IPL_DEPTH_8U, 3);
char* pcvImgData = cv_Image->imageData ;
memcpy((void*)pcvImgData, (void*)wx_Image->GetData(), nWidth*nHeight*3) ;
cvCvtColor(cv_Image, cv_Image, CV_BGR2RGB); //the 2nd argument return CvArr* type
return (IplImage*)cv_Image; //must cast to IplImage* type for executing correctly.
}

/*********************************
Convert IplImage to wxImage format.
*********************************/
wxImage* GUIFrame::IplImageToWxImage(const IplImage* cv_Image)
{
if (cv_Image == NULL) return NULL ;
int nWidth = cv_Image->width ;
int nHeight = cv_Image->height;
wxImage* wx_Image = new wxImage() ;
IplImage* cv_ImageBuf = cvCreateImage (cvSize(nWidth, nHeight), IPL_DEPTH_8U, 3) ;
cvCvtColor((CvArr*)cv_Image, cv_ImageBuf, CV_BGR2RGB);
wx_Image->SetData((unsigned char*)cv_ImageBuf->imageData, nWidth, nHeight, false) ;
return wx_Image ;
}

Read More...

Monday, May 14, 2007

Day record - 2007 May 14


Build GUI interface for a really poor webcam.

  • Camera selection dialog.
  • Camera resource, format and control menu.
A simple callback function to paint 10 by 10(pixels) grid lines on each single frame.
  • callback(IplImage* image)

Read More...

Friday, April 27, 2007

Installing Code::Blocks and using Nightly Builds

Here I only show the installation for WinXP. First of all, you must download the Code::Blocks on it's website. It's a good choice to install the Code::Blocks v1.0 RC2 with MinGW compiler. After finishing the installation, go to the Nightly Builds page and choose the newest release page. It looks like below.

download the two zip file(*.7z) marked with red box and unzip them.

  • Copy " wxmsw28ud_gcc_cb.dll " into C:\windows\system32
  • Copy all the file unziped from CB_20070426_rev3893_win32.7z into C:\program files\codeblocks\
done!!!

Here's a video tutorial from wxwidgets.info enjoy it :)

Read More...

Wednesday, April 25, 2007

A tutorial of WxSmith in Code::Blocks

http://wiki.codeblocks.org/index.php/WxSmith_Tutorial_%26_Pointers

Read More...

Compile WxWidgets with Code::Blocks by MinGW

First step:

Second step:
  • download WxWidgets 2.6.2(might in .7z or setup file format) and then install it to the dictionary C:\wxWidgets-2.6.2, or you can choose the other dictionary.
  • And then we need to compile WxWidgets with Code::Blocks by MINGW
Third step:
  • In command prompt, enter the following commands
  • C:\cd wxwidgets-2.6.2/build/msw
  • C:\mingw32-make -f makefile.gcc BUILD=release SHARED=1 MONOLITHIC=1 USE_XRC=1 UNICODE=1 VENDOR=cb
  • C:\cd ..\..\contrib\build\stc
  • C:\mingw32-make -f makefile.gcc BUILD=release SHARED=1 MONOLITHIC=1 USE_XRC=1 UNICODE=1 VENDOR=cb
about the compilation option, I compile 2 edition
BUILD=release UNICODE=1
BUILD=debug UNICODE=1 (change "release" to "debug" in third step and do it again)

Finally you can find there's a folder " \gcc_dll\ " build in C:\wxwidgets-2.6.2\lib, and then copy the dll files "wxmsw26u_gcc_cb.dll" and "wxmsw26ud_gcc_cb.dll" located in C:\wxwidgets-2.6.2\lib\gcc_lib into C:\windows\system32

Read More...

Tuesday, April 24, 2007

Errors Logged about CODE::BLOCKS

I found a powerful C++ IDE called "Code::Blocks" recently. It's a cross platform IDE and the most important thing is "It's FREE and easy to use". In it's website, the author supplies the patch to improve the program and fix the bug every night which is called "Nightly Builds". However, I found there's a little problem after updating the Code::Blocks with the newest Nightly Builds. A warning sliding window shows a message "Errors Logged" when I start Code::Blocks. And now I found the solution to solve this program.

The solution of Code::Blocks with MinGW in WinXPP

  1. Download the newest Nightly Builds(Ex. CB_20070419_rev3876_win32.7z) and unzip it to the folder which Code::Blocks located in.
  2. Download the wxWidgets dll wxmsw26u_gcc_cb_wx2.6.3p2.7z and unzip it to the system folder C:\Windows\system32\
After the steps described above you will find there's no errors when you start the Code::Blocks. :-)

Read More...